Understanding The "whoami" Command In Windows 10
Understanding the "whoami" Command in Windows 10
Related Articles: Understanding the "whoami" Command in Windows 10
Introduction
With enthusiasm, let’s navigate through the intriguing topic related to Understanding the "whoami" Command in Windows 10. Let’s weave interesting information and offer fresh perspectives to the readers.
Table of Content
Understanding the "whoami" Command in Windows 10

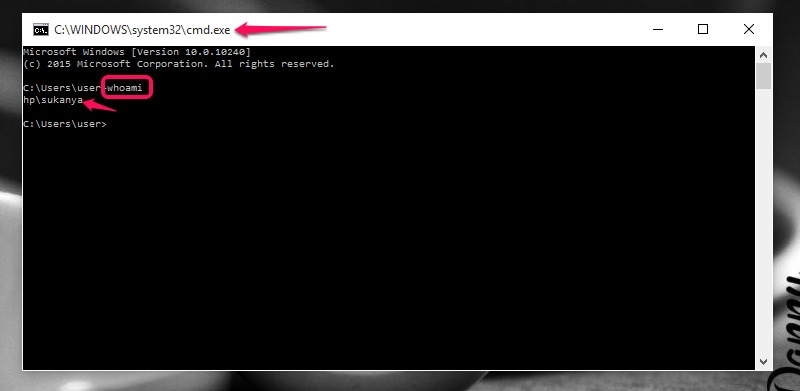
The "whoami" command is a fundamental tool within the Windows 10 operating system, offering users a concise yet powerful way to identify their current security context. In essence, it provides a snapshot of the user’s identity and privileges within the system, aiding in understanding the permissions and access levels associated with their current session.
Delving into the Mechanics of "whoami"
At its core, "whoami" functions by querying the operating system’s security database, retrieving information about the user’s security identifier (SID). This SID is a unique, system-generated identifier assigned to each user account, acting as a digital fingerprint within the Windows environment.
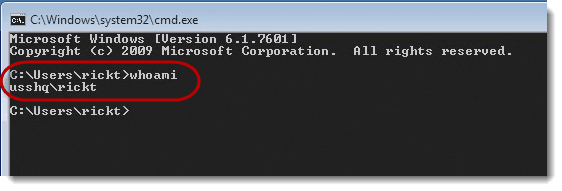
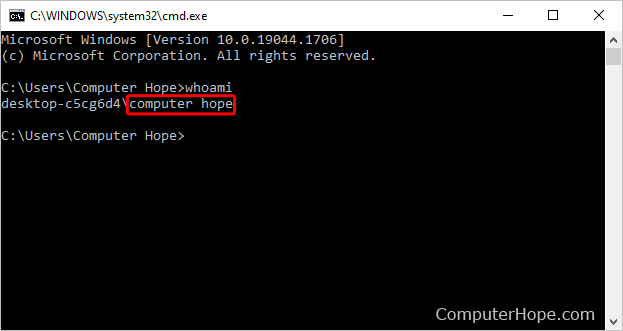
When you execute "whoami," Windows retrieves the SID associated with your current user account and translates it into a human-readable format. This format typically includes the username, domain name (if applicable), and the user’s security group memberships.
Benefits and Applications of "whoami"
The "whoami" command serves various practical purposes, proving invaluable in troubleshooting, security auditing, and understanding user privileges:
-
Troubleshooting Access Issues: If you encounter problems accessing files, folders, or applications, "whoami" can quickly reveal your current user account and its associated permissions. This information can help pinpoint whether the access restriction stems from insufficient privileges or other factors.
-
Security Auditing: In a corporate or enterprise setting, "whoami" can be used to verify user identities and ensure that individuals are operating within their assigned security roles. By examining the output of "whoami," administrators can determine if a user has access to sensitive data or resources they should not be accessing.
-
Understanding User Privileges: The output of "whoami" clearly displays the user’s group memberships, providing insights into the permissions and access levels granted to the user account. This information is critical for understanding the scope of the user’s capabilities within the system.
-
Scripting and Automation: "whoami" can be incorporated into scripts and automated tasks to dynamically retrieve user information. This allows for personalized scripts that adapt to the user’s context, providing tailored actions based on their identity and privileges.
Exploring the Output of "whoami"
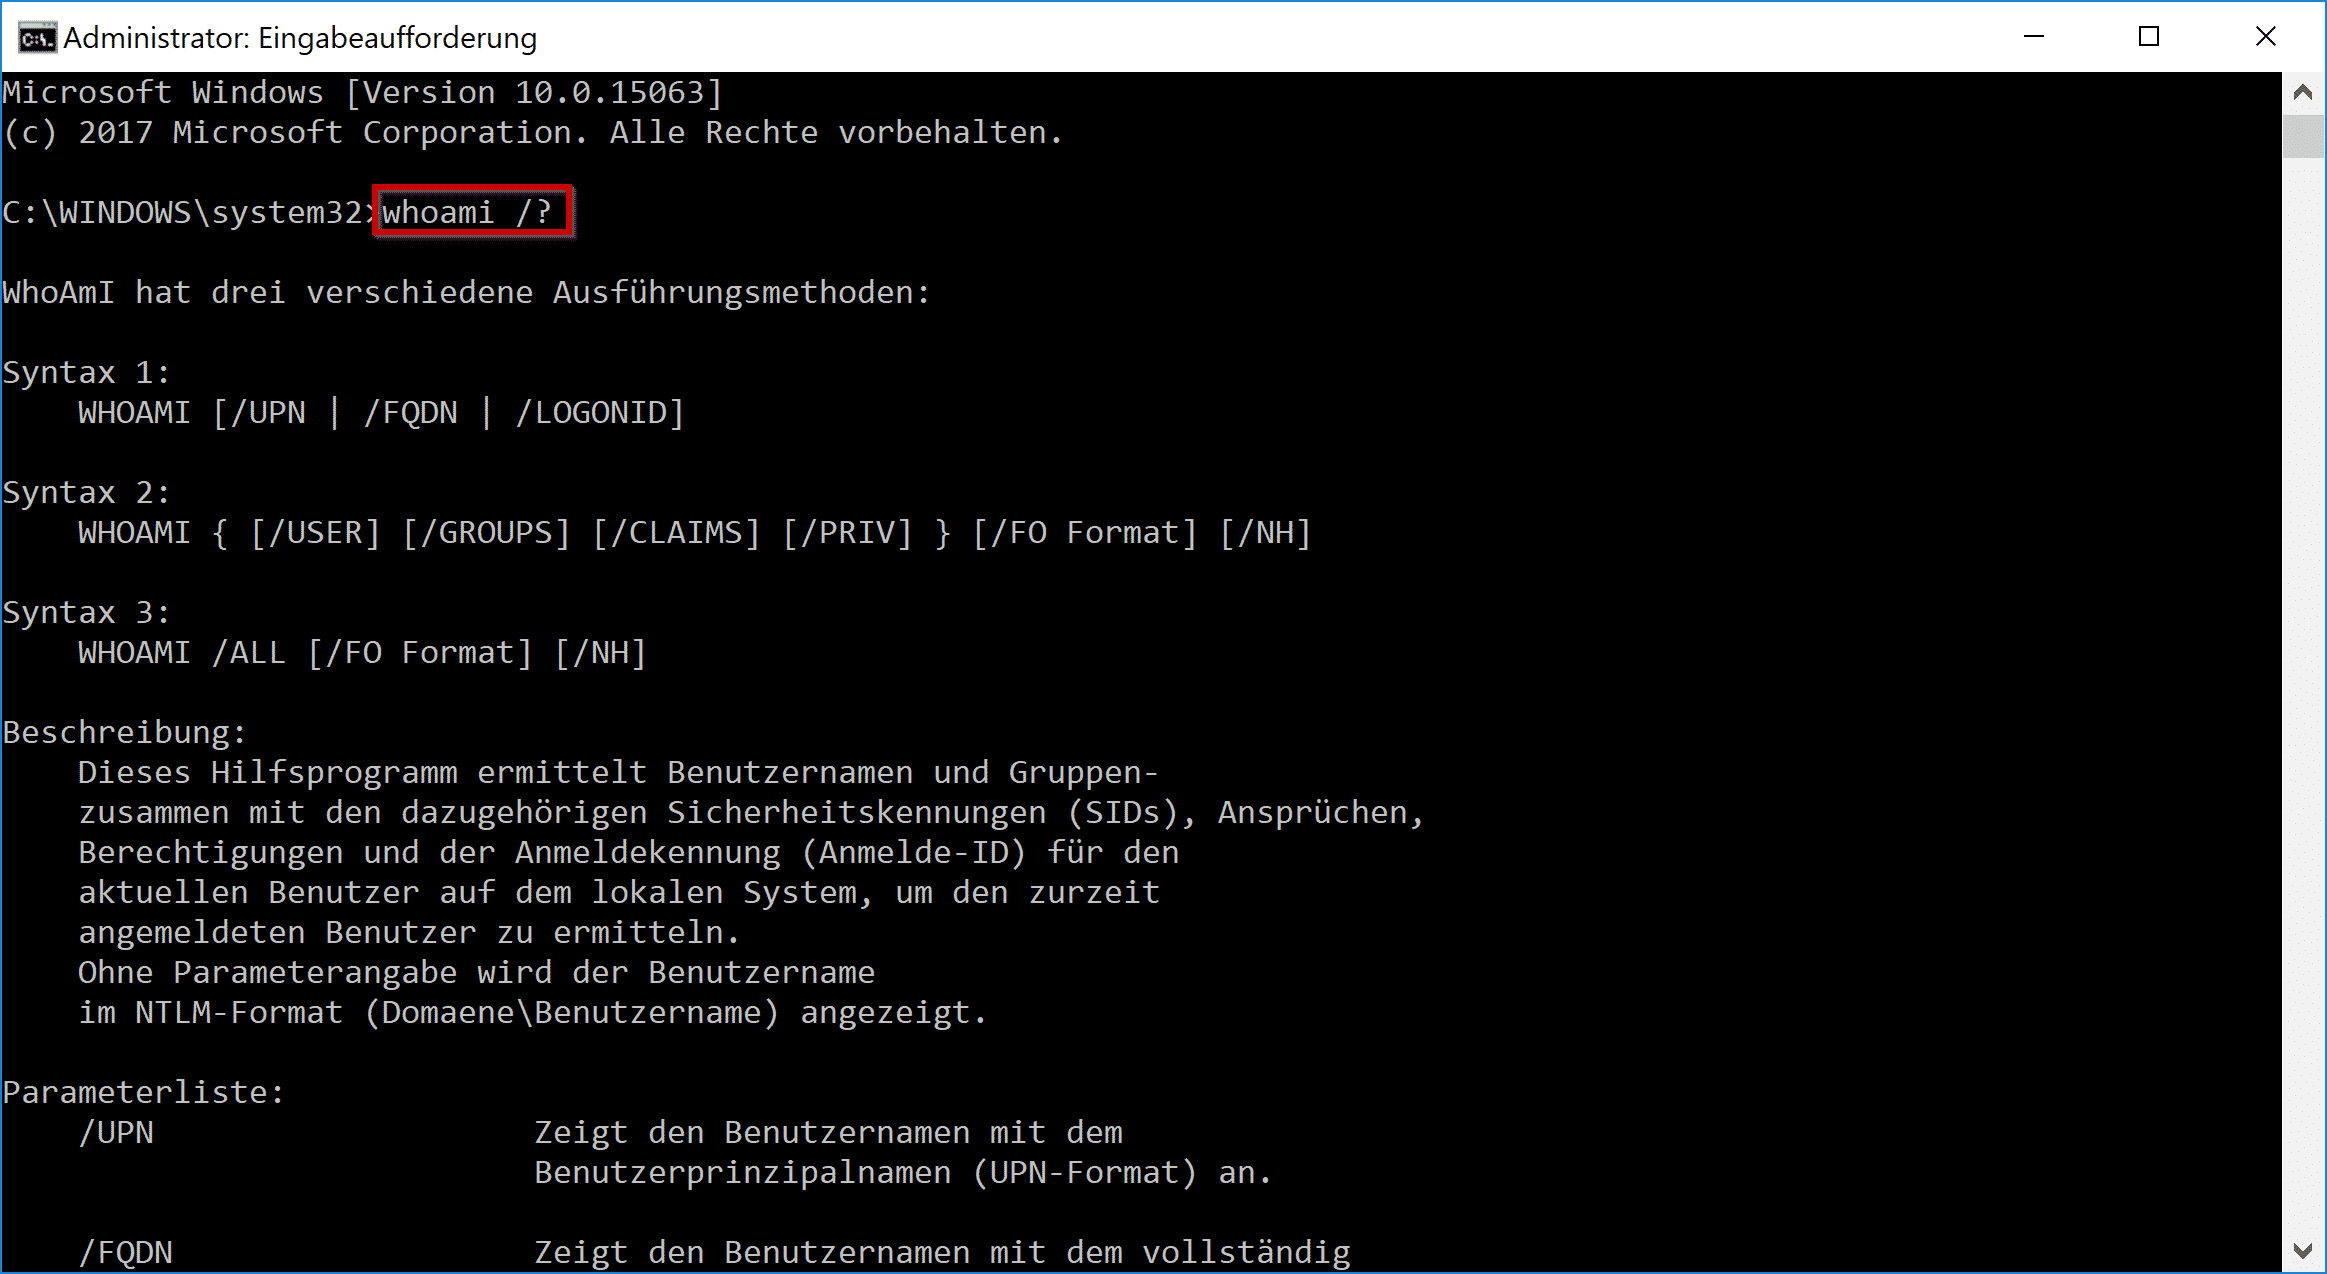
The output of "whoami" typically presents the following information:
- Username: The user account name associated with the current session.
- Domain Name: If the user account belongs to a domain, the domain name is displayed.
- Group Memberships: A list of security groups to which the user account belongs. These groups define the user’s access rights and privileges within the system.
Example Output:
NT AUTHORITYSYSTEMThis output indicates that the current session is running under the "SYSTEM" account, which is a highly privileged account with system-wide access.
DOMAINUsernameThis output indicates that the current session is running under the "Username" account, which belongs to the "DOMAIN" domain.
FAQs Regarding "whoami"
Q: What is the difference between "whoami" and "net user"?
A: Both "whoami" and "net user" provide information about user accounts, but they differ in their focus:
- "whoami" focuses on the current user’s security context, providing their SID, username, domain, and group memberships.
- "net user" offers a more comprehensive view of a specific user account, including details like password policies, account lockout status, and profile information.
Q: Can "whoami" be used to identify other users on the system?
A: No, "whoami" only provides information about the current user’s security context. To retrieve information about other users, you need to use commands like "net user" or "dsquery user."
Q: Can I use "whoami" to change my user account?
A: No, "whoami" is a read-only command. It only retrieves information about the current user account and does not allow for modifications.
Tips for Utilizing "whoami" Effectively
-
Combining "whoami" with Other Commands: "whoami" can be combined with other commands, like "net localgroup" or "icacls," to gain a more in-depth understanding of user privileges and access rights.
-
Understanding Security Groups: Pay close attention to the security group memberships displayed in the output of "whoami." These groups define the user’s permissions and access levels within the system.
-
Using "whoami" in Scripts: Incorporate "whoami" into scripts and automated tasks to dynamically retrieve user information and tailor actions based on the user’s identity and privileges.
Conclusion
The "whoami" command serves as a valuable tool for understanding user security contexts within Windows 10. By providing a concise yet informative snapshot of the user’s identity and privileges, "whoami" facilitates troubleshooting, security auditing, and scripting tasks. Its simplicity and versatility make it an indispensable command for system administrators, developers, and users seeking insights into their current security context.

![How to use the utility “Whoami” in windows Learn [Solve IT]](https://i0.wp.com/techdirectarchive.com/wp-content/uploads/2020/02/screenshot-2020-02-06-at-21.52.23.png?resize=558%2C597u0026is-pending-load=1#038;ssl=1)


Closure
Thus, we hope this article has provided valuable insights into Understanding the "whoami" Command in Windows 10. We appreciate your attention to our article. See you in our next article!