The Lifeline Of Your Windows 10 System: Understanding And Utilizing A Repair USB Drive
The Lifeline of Your Windows 10 System: Understanding and Utilizing a Repair USB Drive
Related Articles: The Lifeline of Your Windows 10 System: Understanding and Utilizing a Repair USB Drive
Introduction
With great pleasure, we will explore the intriguing topic related to The Lifeline of Your Windows 10 System: Understanding and Utilizing a Repair USB Drive. Let’s weave interesting information and offer fresh perspectives to the readers.
Table of Content
- 1 Related Articles: The Lifeline of Your Windows 10 System: Understanding and Utilizing a Repair USB Drive
- 2 Introduction
- 3 The Lifeline of Your Windows 10 System: Understanding and Utilizing a Repair USB Drive
- 3.1 Unveiling the Power of a Repair USB Drive
- 3.2 Creating a Windows 10 Repair USB Drive: A Step-by-Step Guide
- 3.3 Utilizing the Repair USB Drive: Troubleshooting and Recovery
- 3.4 FAQs about Windows 10 Repair USB Drive
- 3.5 Tips for Using a Windows 10 Repair USB Drive
- 3.6 Conclusion
- 4 Closure
The Lifeline of Your Windows 10 System: Understanding and Utilizing a Repair USB Drive

In the intricate world of operating systems, Windows 10 stands as a cornerstone, facilitating a multitude of tasks for users across the globe. However, even the most robust systems can succumb to unforeseen circumstances, encountering issues ranging from software glitches to hardware malfunctions. In such situations, a well-prepared repair tool becomes an invaluable asset, offering a pathway to restore stability and functionality. This is where the Windows 10 repair USB drive emerges as a crucial component, providing a lifeline for troubleshooting and resolving a wide spectrum of problems.
Unveiling the Power of a Repair USB Drive
A Windows 10 repair USB drive, often referred to as a recovery drive, serves as a portable toolkit brimming with essential tools and files. Its primary purpose is to facilitate system repair and recovery, offering a range of functionalities, including:
1. System Recovery: This feature allows users to restore their system to a previous working state, effectively undoing changes made since the chosen restore point. This proves particularly beneficial when encountering software conflicts, driver issues, or malware infections.
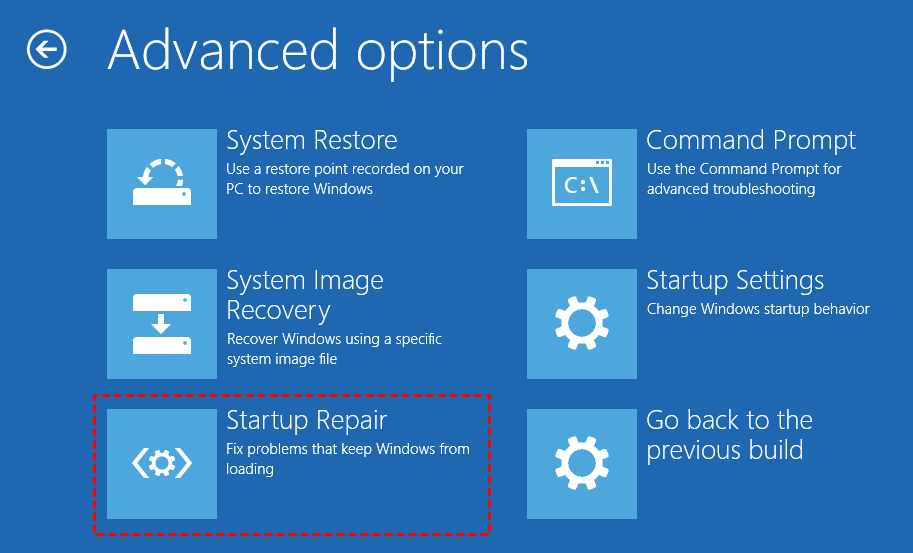
2. Startup Repair: When Windows 10 fails to boot properly, the repair USB drive can initiate a Startup Repair process, automatically diagnosing and attempting to fix common boot-related problems.
3. Command Prompt Access: The repair USB drive provides access to the powerful Command Prompt, enabling users to execute advanced commands for troubleshooting and resolving specific issues. This can involve tasks such as repairing system files, managing partitions, or even reinstalling Windows 10.
4. System Image Restoration: Users can create a system image backup, a snapshot of their entire system, onto an external drive. In case of a major system failure, this image can be restored to bring the system back to its previous state, preserving all data and settings.
5. Reinstalling Windows 10: The repair USB drive can be used to perform a clean installation of Windows 10, erasing all existing data and settings. This option is recommended when encountering severe system corruption or wanting to start fresh.
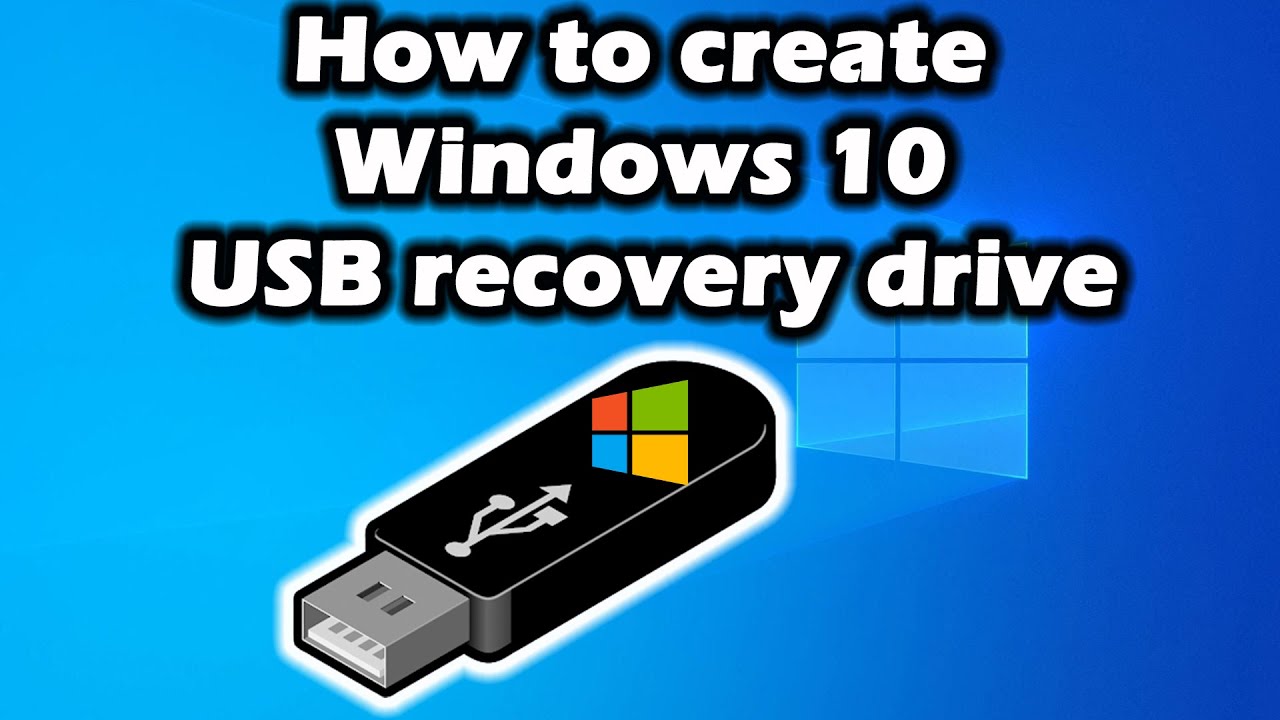
Creating a Windows 10 Repair USB Drive: A Step-by-Step Guide
Creating a repair USB drive is a straightforward process that can be accomplished within minutes. Follow these steps to ensure you have this essential tool readily available:
-
Gather Necessary Materials: You will need a USB flash drive with at least 8GB of storage space and a working Windows 10 computer.
-
Access the Create Recovery Drive Tool: Search for "Create recovery drive" in the Windows search bar and open the corresponding tool.
-
Select USB Drive: Choose the USB flash drive you intend to use as the recovery drive. Note that all data on the drive will be erased during the process.
-
Choose Options: Select the "Back up system files to the recovery drive" option to include system files for a more comprehensive repair tool.
-
Start Creation: Click "Create" and follow the on-screen prompts to complete the process.
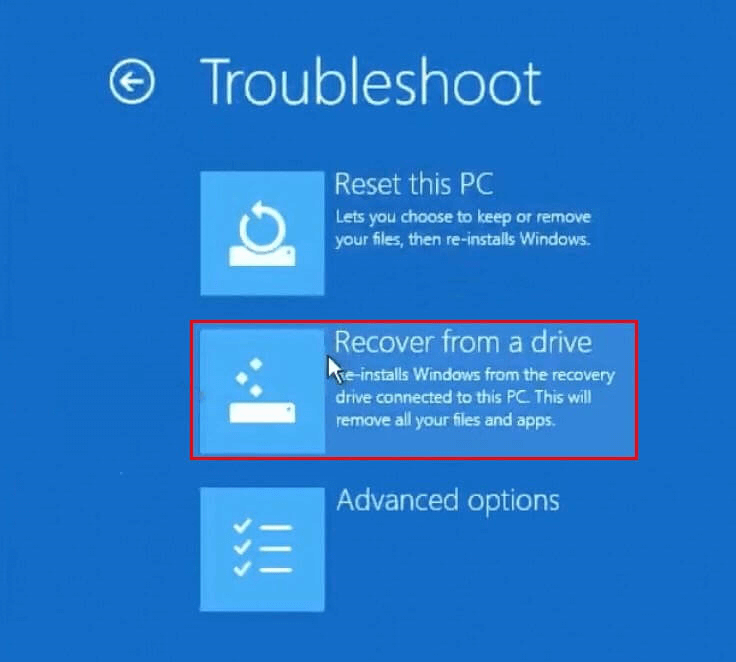
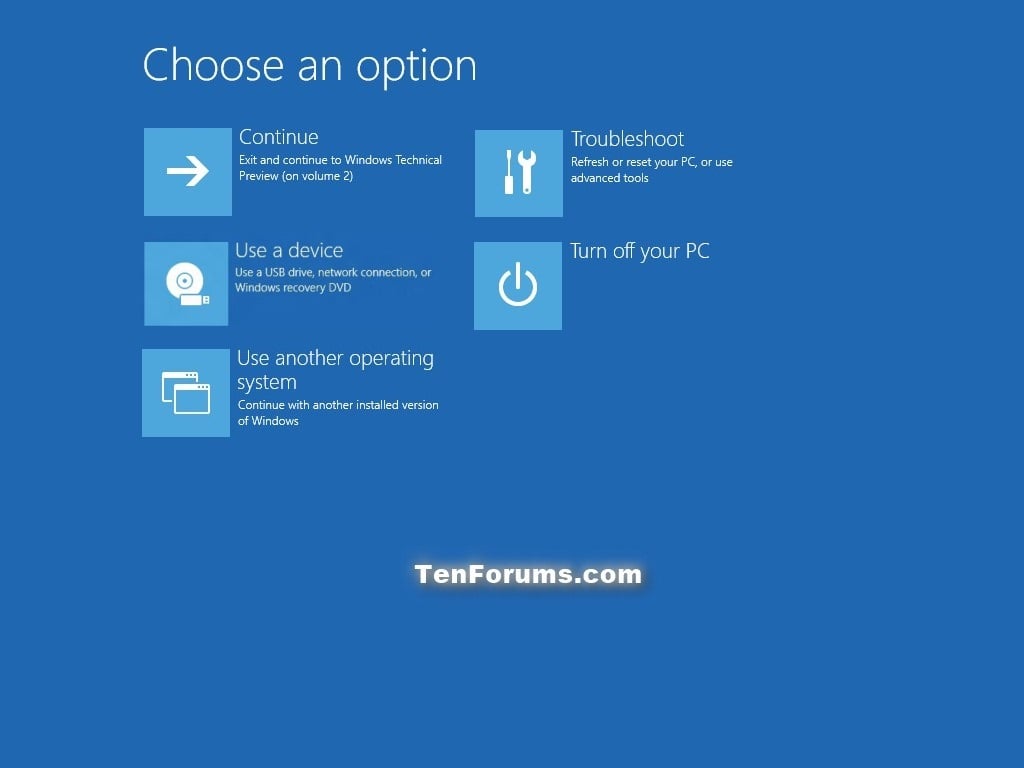
Utilizing the Repair USB Drive: Troubleshooting and Recovery
Once the repair USB drive is created, it can be used to troubleshoot and recover your Windows 10 system. The specific steps will vary depending on the issue encountered, but the following general guidelines apply:
-
Connect the USB Drive: Connect the repair USB drive to your Windows 10 computer.
-
Boot from USB: Restart your computer and access the boot menu (usually by pressing F12 or another key during startup). Select the USB drive as the boot device.
-
Choose Repair Options: The Windows Recovery Environment will appear. Select the appropriate option based on the problem you’re facing, such as Startup Repair, System Restore, or Command Prompt.
-
Follow On-Screen Instructions: The chosen tool will guide you through the repair process. Follow the instructions carefully and provide any necessary information.
FAQs about Windows 10 Repair USB Drive
Q: Is it necessary to create a repair USB drive?
A: While not strictly mandatory, creating a repair USB drive is highly recommended. It acts as a safety net, providing a means to recover your system in case of unforeseen issues.
Q: Can I use a repair USB drive created on another computer?
A: It is generally not advisable to use a repair USB drive created on a different computer. The drive may not contain the necessary files for your specific system.
Q: What happens to my data when using the repair USB drive?
A: The specific impact on data depends on the chosen repair option. System Restore will not erase data, while a clean installation of Windows 10 will erase all data.
Q: Can I use the repair USB drive to upgrade my Windows 10 version?
A: No, the repair USB drive is not designed for upgrading Windows 10 versions. It is solely intended for troubleshooting and recovery.
Q: How often should I create a new repair USB drive?
A: It is recommended to create a new repair USB drive at least once a year or whenever you make significant system changes, such as installing new software or upgrading hardware.
Tips for Using a Windows 10 Repair USB Drive
1. Back up your data: Before attempting any major repair using the USB drive, ensure that you have backed up all important data to an external drive or cloud storage.
2. Use the correct USB drive: Ensure that you are using the same USB drive that you used to create the repair drive.
3. Understand the risks: Be aware of the potential consequences of each repair option, particularly with regard to data loss.
4. Seek professional help: If you are unsure about any steps or encounter difficulties, consider seeking assistance from a qualified technician.
Conclusion
The Windows 10 repair USB drive stands as a vital tool for maintaining system stability and ensuring a smooth computing experience. Its ability to diagnose and resolve a wide range of issues, from minor glitches to major failures, makes it an essential component for any Windows 10 user. By creating and utilizing this recovery tool, users can empower themselves to overcome unforeseen challenges and maintain the optimal performance of their systems.


Closure
Thus, we hope this article has provided valuable insights into The Lifeline of Your Windows 10 System: Understanding and Utilizing a Repair USB Drive. We hope you find this article informative and beneficial. See you in our next article!