Removing The Windows 10 Watermark: A Comprehensive Guide To Registry Editing
Removing the Windows 10 Watermark: A Comprehensive Guide to Registry Editing
Related Articles: Removing the Windows 10 Watermark: A Comprehensive Guide to Registry Editing
Introduction
In this auspicious occasion, we are delighted to delve into the intriguing topic related to Removing the Windows 10 Watermark: A Comprehensive Guide to Registry Editing. Let’s weave interesting information and offer fresh perspectives to the readers.
Table of Content
Removing the Windows 10 Watermark: A Comprehensive Guide to Registry Editing

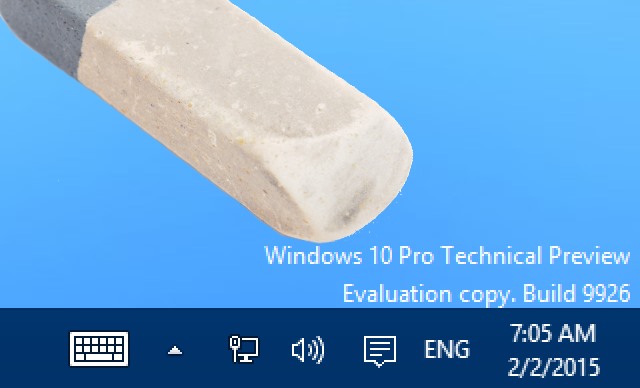
Windows 10, like its predecessors, often displays a watermark on the desktop, typically indicating an evaluation, non-activated, or unauthorized version of the operating system. While this watermark serves as a reminder to activate the software, it can be visually distracting and aesthetically displeasing for many users. Removing the watermark, however, requires a careful approach as altering the system registry can lead to unforeseen complications if not performed correctly.
This guide provides a detailed explanation of the process of removing the watermark using the Registry Editor, emphasizing the importance of caution and providing clear instructions to mitigate potential risks.
Understanding the Registry Editor
The Registry Editor is a powerful tool that stores system-level settings and configurations for Windows. While it allows advanced users to customize their operating system, modifying registry entries without proper knowledge can lead to instability or even data loss. Therefore, it is crucial to proceed with extreme caution and create a system restore point before making any changes.
Steps to Remove the Watermark
-
Create a System Restore Point: Before modifying the registry, it is essential to create a system restore point. This allows you to revert to a previous state if any issues arise. Navigate to "Create a restore point" in the Control Panel or search for "Create a restore point" in the Windows search bar.
-
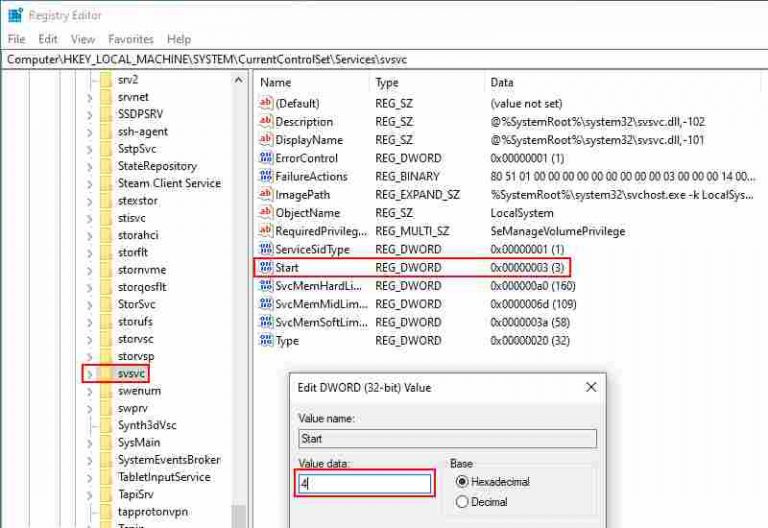
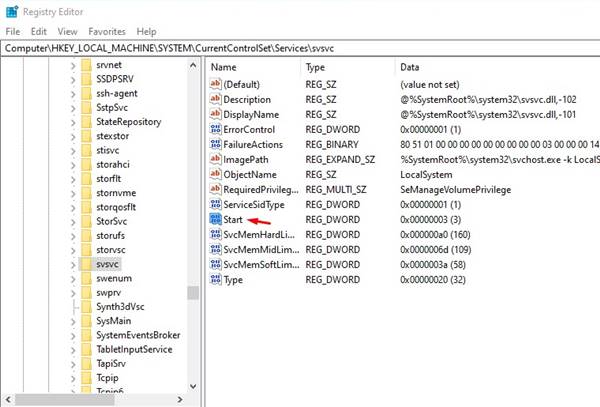
Open the Registry Editor: Press "Windows key + R" to open the Run dialog box, type "regedit" and press Enter. This will open the Registry Editor.
-
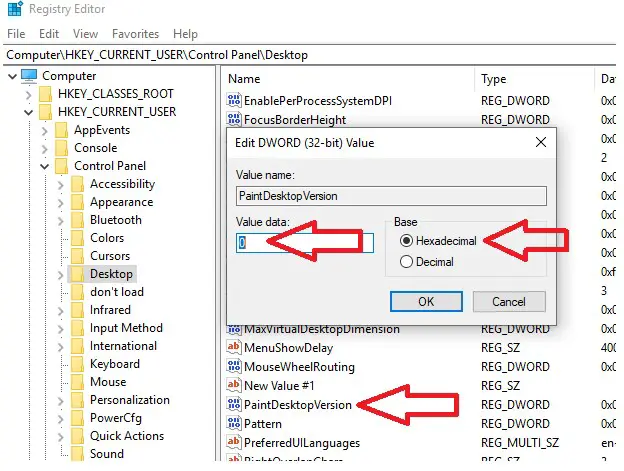
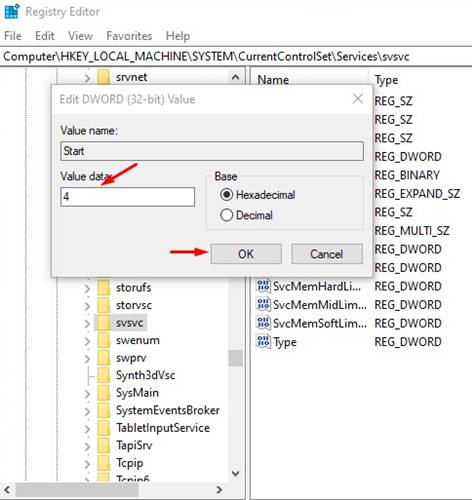
Navigate to the Relevant Key: In the Registry Editor, navigate to the following key:
HKEY_LOCAL_MACHINESOFTWAREMicrosoftWindowsCurrentVersionAuthenticationLogonUIBackground -
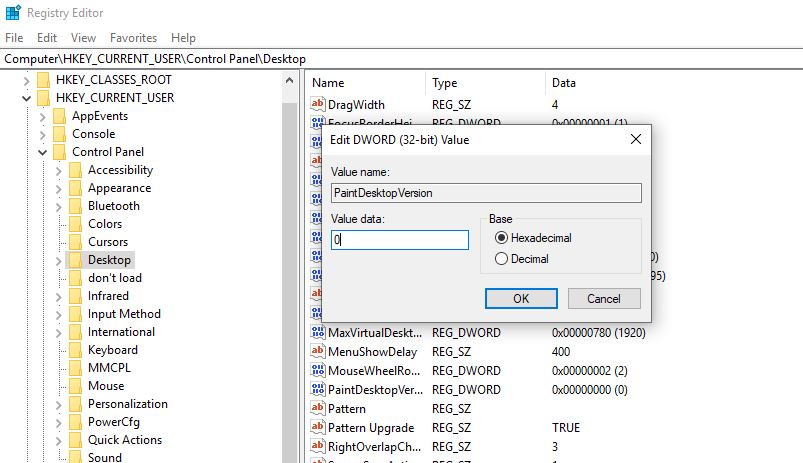
Modify the "OEMBackground" Value: Locate the "OEMBackground" value within the "Background" key. Right-click on it and select "Modify". In the "Value data" field, change the value to "0" and click "OK".
-
Close the Registry Editor: Close the Registry Editor and restart your computer. The watermark should now be removed from your desktop.
Important Notes:
- Back Up the Registry: Before making any changes, it is strongly recommended to create a backup of the registry. This ensures that you can restore the original settings if necessary. To back up the registry, navigate to "File" -> "Export" in the Registry Editor. Choose a location to save the backup file.
- Use Caution: Modifying the registry is an advanced procedure. Incorrect changes can lead to system instability or data loss. Proceed with caution and refer to reliable sources for guidance.
- Alternative Solutions: While modifying the registry is a common method, other solutions exist, such as using third-party software or disabling the watermark through a group policy setting. However, these methods may require additional steps or have limitations.
FAQs
Q: Is it safe to remove the watermark using the Registry Editor?
A: While modifying the registry can be safe if done correctly, it is crucial to proceed with caution. Incorrect changes can lead to system instability or data loss. Always back up the registry before making any modifications.
Q: Will removing the watermark affect the functionality of Windows 10?
A: Removing the watermark itself does not affect the functionality of Windows 10. It simply removes the visual reminder to activate the operating system. However, modifying the registry can potentially lead to unforeseen issues if not done correctly.
Q: Can I restore the watermark after removing it?
A: Yes, you can restore the watermark by changing the "OEMBackground" value back to its original setting. If you have backed up the registry, you can easily restore it to its previous state.
Q: What if the watermark persists after modifying the registry?
A: If the watermark remains after modifying the registry, the issue may be related to other factors, such as a corrupted system file or a third-party application interfering with the display. In this case, further troubleshooting may be required.
Tips
- Consult with a Tech Expert: If you are unsure about the process or have concerns about potential risks, it is advisable to consult with a qualified IT professional.
- Use a Registry Cleaner: While not a necessity, a registry cleaner can help identify and fix any inconsistencies or errors in the registry. However, choose reputable software and proceed with caution.
- Keep Your System Updated: Regularly update your Windows system and install security patches to ensure optimal performance and mitigate potential risks.
Conclusion
Removing the Windows 10 watermark using the Registry Editor can be a viable solution for users who find it visually distracting. However, it is crucial to understand the potential risks involved and proceed with caution. By creating a system restore point, backing up the registry, and following the instructions carefully, users can safely remove the watermark while minimizing the risk of system instability or data loss. Remember, if you are unsure about the process or have any concerns, consult with a qualified IT professional for assistance.

![How to Remove Activate Windows 10 Watermark? [Full Guide] - Tech Untouch](https://techuntouch.com/wp-content/uploads/2020/09/registry-editor-process.png)
Closure
Thus, we hope this article has provided valuable insights into Removing the Windows 10 Watermark: A Comprehensive Guide to Registry Editing. We appreciate your attention to our article. See you in our next article!