Mastering The Art Of Video Editing With Windows 10’s Built-in Tool
Mastering the Art of Video Editing with Windows 10’s Built-in Tool
Related Articles: Mastering the Art of Video Editing with Windows 10’s Built-in Tool
Introduction
With enthusiasm, let’s navigate through the intriguing topic related to Mastering the Art of Video Editing with Windows 10’s Built-in Tool. Let’s weave interesting information and offer fresh perspectives to the readers.
Table of Content
Mastering the Art of Video Editing with Windows 10’s Built-in Tool
In the digital age, video content reigns supreme. From captivating social media posts to professional presentations, the ability to edit video has become a valuable skill. Fortunately, Windows 10 offers a user-friendly, built-in video editor that empowers individuals to create engaging content without the need for expensive software.
This comprehensive guide delves into the intricacies of the Windows 10 video editor, providing a step-by-step tutorial that demystifies the process of creating professional-looking videos.
Understanding the Windows 10 Video Editor
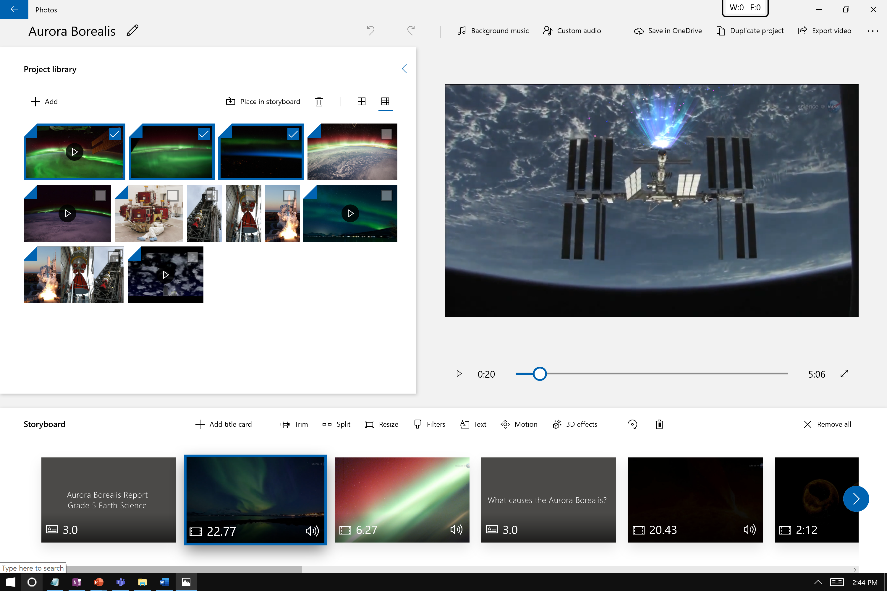
The Windows 10 video editor, formally known as the "Photos" app, is a versatile tool that allows users to combine, trim, and enhance video clips with ease. Its intuitive interface and straightforward features make it ideal for both beginners and seasoned editors.
Getting Started with the Windows 10 Video Editor
- Accessing the Video Editor: Launch the "Photos" app from the Start menu or search bar.
- Creating a New Project: Select the "New video project" option from the "Create" tab.
- Importing Media: Navigate to the "Add" tab and select the video clips, photos, and audio files you wish to incorporate into your project.
Editing Your Video
1. Arranging Clips:
- Drag and drop clips in the desired order on the timeline.
- Use the "Split" option to divide clips into smaller segments.
- Utilize the "Trim" function to remove unwanted portions of a clip.
2. Adding Transitions:
- Select a transition from the "Transitions" tab and drag it between clips to create seamless transitions.
- Experiment with various transition styles like fade, cross dissolve, and wipe.
3. Enhancing with Effects:
- The "Effects" tab provides a library of filters, motion effects, and 3D effects to add visual flair to your video.
- Apply filters to adjust color, brightness, and contrast.
- Incorporate motion effects like pan and zoom to create dynamic scenes.
4. Adding Audio:
- Import background music from your library or use the built-in music library.
- Adjust audio volume and fade in/out points to create a cohesive soundtrack.
- Add narration or voiceover by recording directly through the editor.
**5. Text and
![How to Use Windows 10 Video Editor [Detailed Guide]](https://images.hitpaw.com/guide/video-editor/add-video-effect.jpg?w=800u0026h=461)

![[2023 Guide] How to Use Windows 10 Built-in Video Editor - EaseUS](https://multimedia.easeus.com/images/multimedia/video-editor/screenshots/add-mosaic-step1.png)
![[2023 Guide] How to Use Windows 10 Built-in Video Editor - EaseUS](https://multimedia.easeus.com/images/multimedia/video-editor/screenshots/add-special-effect-music.png)
![[2023 Guide] How to Use Windows 10 Built-in Video Editor - EaseUS](https://multimedia.easeus.com/images/multimedia/video-editor/screenshots/add-special-effect-overlays.png)
Closure
Thus, we hope this article has provided valuable insights into Mastering the Art of Video Editing with Windows 10’s Built-in Tool. We appreciate your attention to our article. See you in our next article!