Demystifying The Windows 10 Virtual Memory: A Comprehensive Guide
Demystifying the Windows 10 Virtual Memory: A Comprehensive Guide
Related Articles: Demystifying the Windows 10 Virtual Memory: A Comprehensive Guide
Introduction
In this auspicious occasion, we are delighted to delve into the intriguing topic related to Demystifying the Windows 10 Virtual Memory: A Comprehensive Guide. Let’s weave interesting information and offer fresh perspectives to the readers.
Table of Content
Demystifying the Windows 10 Virtual Memory: A Comprehensive Guide

In the realm of operating systems, efficient memory management is paramount. Windows 10, like its predecessors, relies on a sophisticated system to ensure seamless operation, even when the physical RAM resources are stretched thin. This system, known as virtual memory, utilizes a dedicated portion of the hard disk drive (HDD) or solid-state drive (SSD) as an extension of the physical RAM. This extension, often referred to as the page file, swap file, or paging file, plays a crucial role in maintaining system stability and responsiveness.
Understanding the Mechanics of Virtual Memory
At its core, virtual memory enables the operating system to run programs and applications that require more memory than physically available. When the RAM becomes saturated, Windows 10 temporarily stores inactive data and program instructions in the designated swap file. This allows the system to free up RAM for active processes, ensuring optimal performance.
The Swap File: A Lifeline for Memory-Intensive Tasks
The importance of the swap file becomes particularly evident when dealing with memory-intensive tasks such as:
- Running multiple applications simultaneously: Modern software often demands significant RAM resources. When multiple applications are open, the swap file acts as a buffer, allowing the system to manage the demands of each program without compromising overall performance.
- Editing large files: Applications like video editing software, graphic design tools, and 3D modeling programs often require substantial memory to handle large files. The swap file provides the necessary space to store data that cannot be held entirely in RAM.
- Playing high-end games: Modern video games are notorious for their memory requirements. The swap file acts as a vital component in ensuring smooth gameplay, particularly when the system’s RAM is nearing its capacity.
The Impact of Swap File Size on System Performance
The size of the swap file directly influences the system’s performance. A swap file that is too small can lead to frequent swapping, causing noticeable slowdowns and performance degradation. Conversely, an excessively large swap file can unnecessarily consume disk space and potentially hinder performance due to the increased overhead associated with disk access.
Determining the Optimal Swap File Size
Finding the optimal swap file size is a delicate balance. Windows 10 typically manages the swap file size automatically, adjusting it based on system usage. However, users can manually configure the swap file size to optimize performance for specific scenarios.
Here are some general guidelines:
- For systems with limited RAM (less than 8GB): A larger swap file, typically 1.5 times the amount of physical RAM, is recommended to accommodate memory-intensive tasks.
- For systems with ample RAM (8GB or more): A smaller swap file, around 1.5 times the amount of physical RAM or even less, is sufficient.
- For systems with SSDs: A smaller swap file is generally preferred, as SSDs are faster than HDDs, minimizing the impact of disk access on performance.
Managing the Swap File in Windows 10
Windows 10 provides options to manage the swap file:
- Automatic management: By default, Windows 10 automatically manages the swap file size, adjusting it based on system usage. This approach is suitable for most users and offers a balance between performance and disk space utilization.
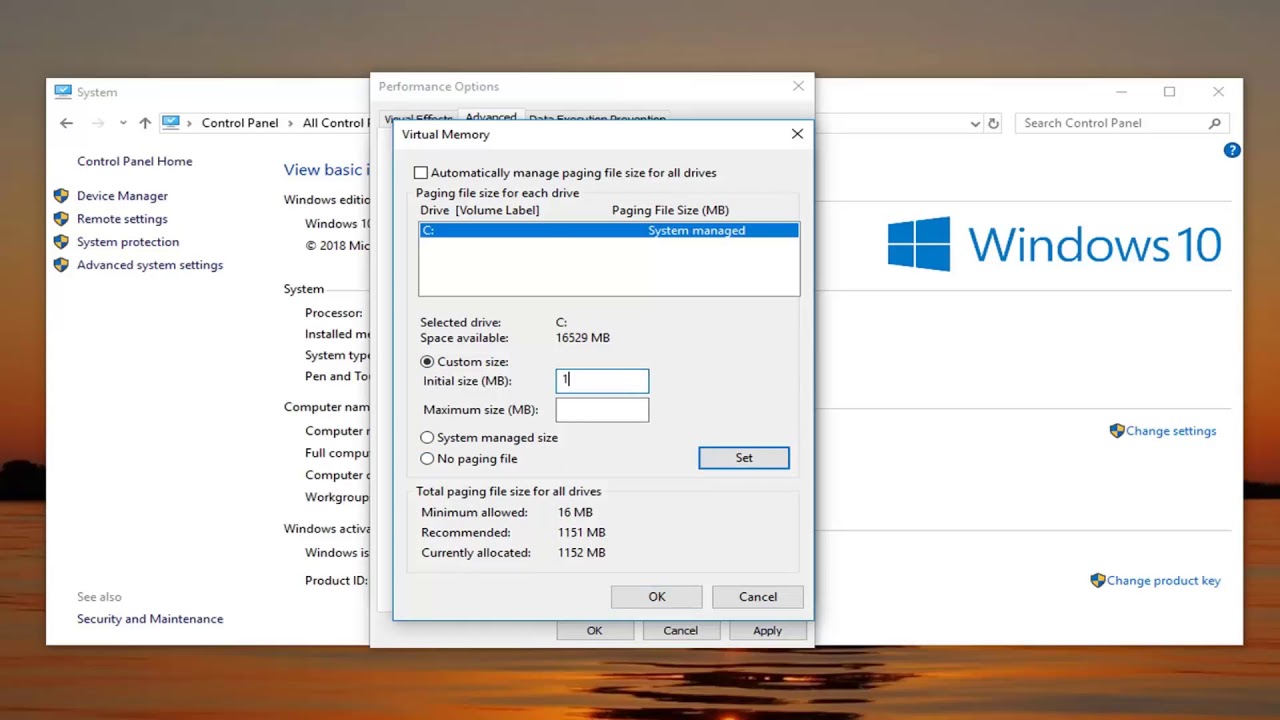
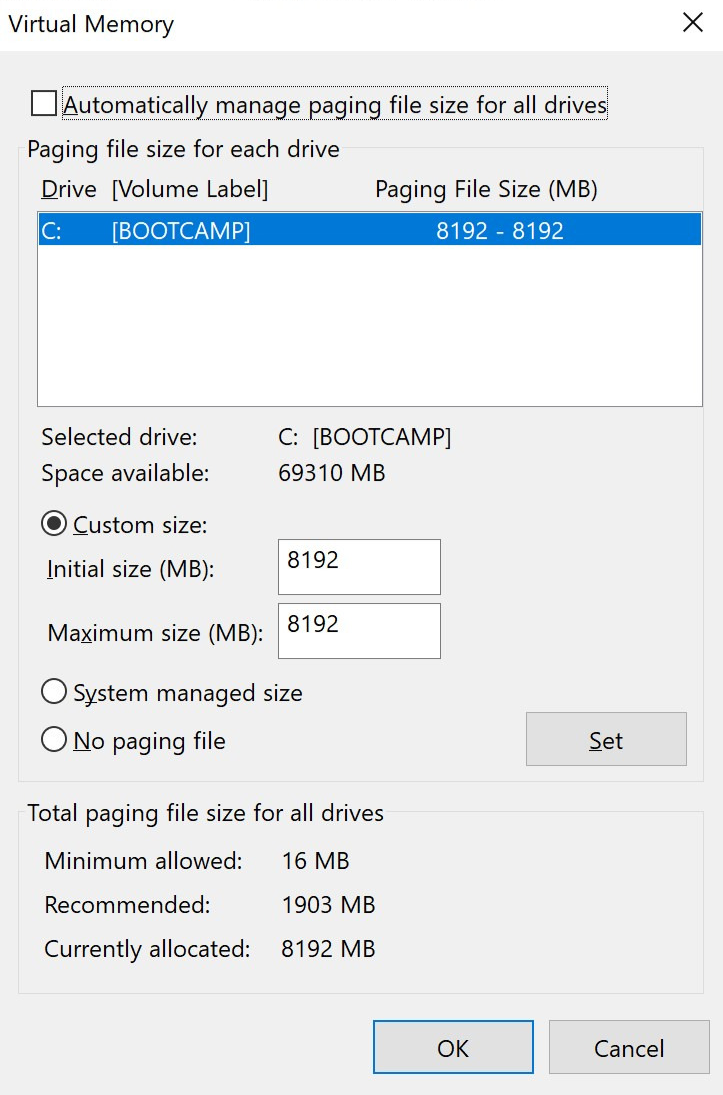
- Manual configuration: Advanced users can manually configure the swap file size by following these steps:
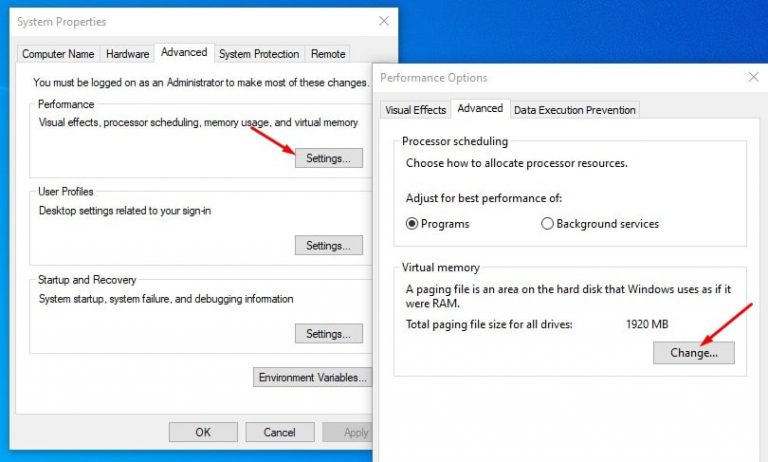
- Open System Properties: Press Windows key + Pause/Break or right-click This PC and select Properties.
- Navigate to Advanced system settings: Click Advanced system settings in the left pane.
- Select the Advanced tab: In the System Properties window, switch to the Advanced tab.
- Click Settings under Performance: Under the Performance section, click Settings.
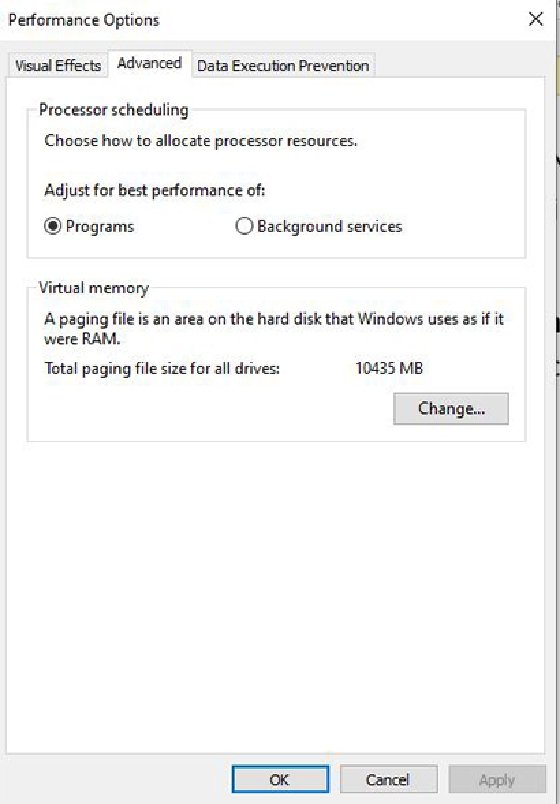
- Choose the Advanced tab: In the Performance Options window, switch to the Advanced tab.
- Click Change under Virtual memory: Under the Virtual memory section, click Change.
- Select the desired option: Choose either Let Windows automatically manage paging file size for all drives or Custom size.
- Configure custom settings (optional): If you choose Custom size, enter the desired minimum and maximum sizes for the swap file.
- Apply changes: Click Set to apply the changes and OK to close the windows.
Tips for Optimizing Swap File Performance
- Use an SSD: If possible, use an SSD as your primary drive. SSDs offer significantly faster data access speeds compared to HDDs, minimizing the impact of disk access on performance.
- Minimize unnecessary programs: Close any programs that are not actively being used to free up RAM and reduce the need for swapping.
- Defragment the swap file: Regularly defragmenting the swap file can improve performance, especially if you are using an HDD.
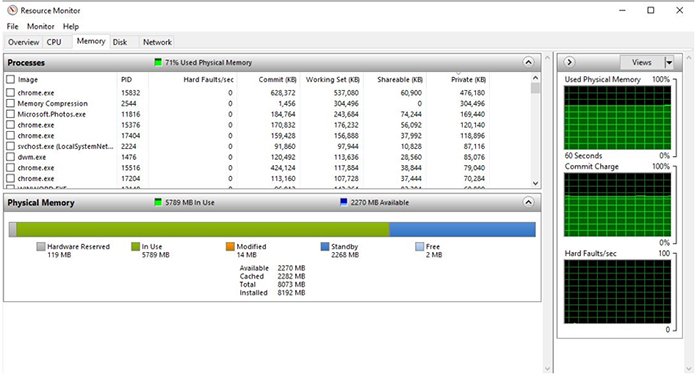
- Monitor system performance: Use the Task Manager or other system monitoring tools to observe the swap file usage and adjust its size accordingly.
Frequently Asked Questions (FAQs) about Windows 10 Swap File
1. Is it necessary to manually adjust the swap file size?
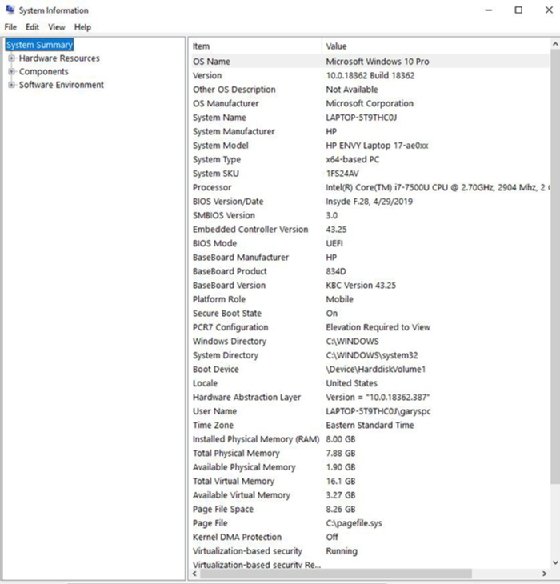
For most users, Windows 10’s automatic swap file management is sufficient. However, users with specific performance requirements or limited RAM resources may benefit from manual configuration.
2. What happens if the swap file becomes full?
If the swap file becomes full, the system may experience significant performance degradation. The operating system will struggle to allocate memory for active processes, leading to slowdowns, crashes, or even system instability.
3. Is it safe to disable the swap file?
Disabling the swap file is generally not recommended, as it can lead to system instability, particularly when running memory-intensive tasks. However, if you have ample RAM and rarely encounter memory-related issues, disabling the swap file may be an option.
4. Can I move the swap file to a different drive?
Yes, you can move the swap file to a different drive, but it’s generally recommended to keep it on the primary drive for optimal performance. Moving it to a secondary drive can increase disk access time and potentially impact performance.
5. Does the swap file affect boot time?
The swap file can slightly increase boot time, as the operating system needs to load the swap file into memory. However, this impact is usually minimal.
Conclusion
The swap file, a vital component of Windows 10’s virtual memory system, plays a crucial role in maintaining system stability and performance. By effectively managing the swap file size and understanding its importance, users can ensure optimal system performance, even when facing memory-intensive tasks. While automatic management is sufficient for most users, advanced users can manually configure the swap file size to tailor it to specific needs. Ultimately, understanding the intricacies of the swap file empowers users to optimize their Windows 10 experience and unlock the full potential of their systems.

-In-Windows-10.png)
Closure
Thus, we hope this article has provided valuable insights into Demystifying the Windows 10 Virtual Memory: A Comprehensive Guide. We appreciate your attention to our article. See you in our next article!